Elevate Your Photos: The Art and Science of Framing Technique
Framing is a key technique that can take your photos to the next level. It guides the viewer’s eye and adds depth to your images. Let’s explore what framing means, how to use it, and why it matters.
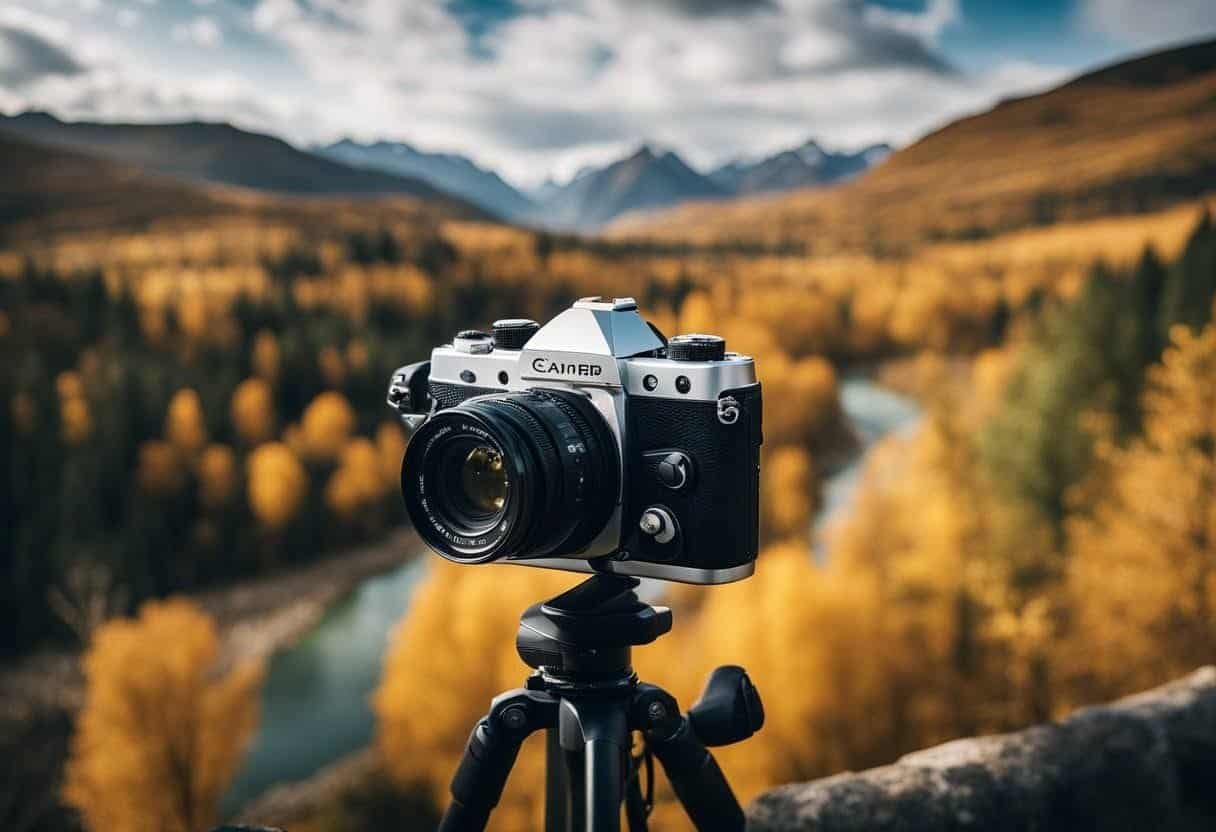
*Example of adding depth to a picture through multiple levels of perspective.
Definition and Importance
Framing in photography is the use of elements within a scene to create a border around the main subject. It’s a powerful tool that can make photos more interesting and eye-catching. Framing helps draw attention to the subject and can add context or depth to an image.
Good framing can:
- Guide the viewer’s eye
- Add layers to a photo
- Create a sense of depth
- Highlight the main subject
Photographers use framing to tell a story or evoke certain feelings. It’s a simple yet effective way to improve composition and make photos stand out.
Types of Framing Techniques

There are many ways to frame a subject in photography. Here are some common techniques:
- Natural frames: Using trees, doorways, or arches
- Architectural elements: Windows, bridges, or building columns
- People or objects: Shooting through a crowd or between items
- Light and shadow: Creating frames with contrast
Each type of frame can create a different mood or effect. Natural frames often add a sense of place, while architectural elements can make a photo feel more structured.
Framing can dramatically improve photographs in many situations. It works well in landscapes, portraits, and street photography.
The Role of Focus in Framing
Focus plays a big part in framing. It helps decide what the viewer sees first and how they see it. Here’s how focus affects framing:
- Sharp frame, blurry subject: Creates mystery or softness
- Blurry frame, sharp subject: Draws attention to the main focus
- Everything in focus: Shows detail throughout the image
The choice of focus can change the whole feel of a photo. It’s important to think about what parts of the frame and subject should be sharp or soft.
Using focus effectively can add depth to an image. It helps create layers and guides the eye through the photo.
Fundamentals of Photography
Taking great photos requires mastering key technical and artistic skills. Good photographers understand exposure, composition, and how to use depth and angles to create compelling images.
Exposure Basics
Exposure refers to how light or dark an image is. It’s controlled by three main settings: aperture, shutter speed, and ISO. Aperture affects depth of field. A wider aperture (smaller f-number) creates a shallower depth of field. Shutter speed controls motion blur. Faster speeds freeze action, while slower speeds create blur. ISO determines the camera sensor’s light sensitivity. Higher ISO allows shooting in darker conditions but can add grain.
The exposure triangle shows how these three elements work together. Changing one setting requires adjusting the others to maintain proper exposure. Photographers must balance these settings based on their creative goals and shooting conditions.
Many cameras have auto modes, but learning manual controls gives more creative freedom. Practice adjusting settings in different lighting to see how they affect images.
Developing an Eye for Composition
Composition is crucial for creating engaging photos. The rule of thirds is a basic guideline. Imagine dividing the frame into a 3×3 grid. Place key elements along the lines or at intersections.
Leading lines draw the viewer’s eye through the image. Look for natural lines like roads, fences, or rivers to guide attention to the main subject. Symmetry and patterns can create visually pleasing images. Frame subjects with natural elements like trees or doorways.
Negative space, the empty area around a subject, can make an image more powerful. Don’t be afraid to leave blank areas. Pay attention to the background. A cluttered or distracting backdrop can ruin an otherwise great shot.
Understanding Depth and Angles
Depth adds dimension to photos. Use foreground elements to create a sense of depth. This draws the viewer into the scene. Shooting from different heights changes perspective. Get low for dramatic shots of tall subjects. Climb high for unique bird’s-eye views.
Try unusual angles to make ordinary subjects interesting. A slight tilt can add energy to an image. Experiment with extreme close-ups or wide shots. Each angle tells a different story.
Depth of field affects how much of the image is in focus. A shallow depth of field blurs the background, isolating the subject. This works well for portraits. A deep depth of field keeps everything sharp, ideal for landscapes.
Shooting Techniques for Beginners
Mastering basic shooting techniques can greatly improve your photography skills. These tips will help you capture stunning landscapes, enhance visual appeal, and avoid common framing mistakes.
Landscape Photography Tips
When shooting landscapes, use a wide-angle lens to capture more of the scene. Set your camera to a small aperture (high f-number) for a large depth of field. This keeps both foreground and background in focus.
Use a tripod to keep your camera steady, especially in low light conditions. This allows for slower shutter speeds without introducing camera shake.
Try the rule of thirds. Imagine your frame divided into a 3×3 grid. Place key elements along these lines or at their intersections for a balanced composition.
Consider the time of day. Shoot during golden hour for warm, soft light that adds depth to your landscapes.
Techniques for Enhancing Visual Appeal
Framing in photography can add depth and context to your images. Use natural elements like trees or archways to frame your main subject.
Play with perspective. Get low to the ground or find a high vantage point for unique angles.
Incorporate leading lines to guide the viewer’s eye through the image. These can be roads, fences, or natural formations.
Use color contrast to make your subject stand out. Pair complementary colors or use bold colors against muted backgrounds.
Experiment with different focal lengths. Wide-angle lenses exaggerate depth, while telephoto lenses compress the scene.
Common Framing Mistakes to Avoid
Don’t place your subject dead center in every shot. This can make images feel static. Use the rule of thirds for more dynamic compositions.
Avoid cluttered backgrounds. They can distract from your main subject. Move around to find cleaner backdrops or use a wider aperture to blur the background.
Watch your horizons. Tilted horizons can make landscapes feel off-balance. Use your camera’s built-in level or straighten in post-processing.
Don’t cut off important parts of your subject. Check your frame edges before shooting to ensure everything fits.
Be mindful of mergers. These occur when elements in the background appear to grow out of your subject. Shift your position slightly to separate these elements.
Maximizing the Impact of Your Images
Framing techniques can greatly enhance your photos. They draw attention to key elements and create visual interest. Let’s explore two powerful framing methods.
Strategic Use of Natural Frames
Natural frames add depth and context to images. Look for arches, doorways, or tree branches to frame your subject. These elements guide the viewer’s eye to the main focus.
Position your subject within the frame carefully. Experiment with different angles and distances. A well-placed natural frame can separate the subject from the background.
Consider the frame’s shape and texture. Rough frames like tree bark contrast nicely with soft subjects. Smooth frames like windows complement architectural shots.
Pay attention to lighting. Natural frames can create interesting shadows or highlight areas. Use this to your advantage to add mood or drama to your composition.
Emotional Resonance Through Framing
Framing can evoke strong emotions in viewers. Choose frames that match the mood you want to convey. A dark frame can create mystery or tension. A bright frame can suggest hope or joy.
Use framing to tell a story. A person looking through a window frame might suggest longing or curiosity. A subject framed by a heart shape could represent love or affection.
Think about the frame’s symbolism. A clock frame might represent the passage of time. A broken frame could suggest struggle or imperfection.
Experiment with partial frames. These can add intrigue without fully enclosing the subject. Try framing just one side or corner of your image for a unique effect.
Navigating the Digital Space
The digital realm offers photographers new ways to share work and protect their rights. Online platforms provide spaces to connect with others and showcase images. Understanding licensing and copyright is key for digital photographers.
Online Photography Communities
Photography communities help beginners learn and grow. Sites like Flickr and 500px let users share photos and get feedback. Instagram is popular for quick sharing and building a following.
These platforms have pros and cons. They offer exposure but may limit image quality. Privacy settings are important to control who sees your work. Some sites have rights grabs in their terms of service.
Join groups focused on your interests. Landscape, portrait, or street photography groups can teach new skills. Be open to constructive criticism to improve your craft.
Managing Digital Licenses and Copyrights
Photographers must protect their work online. Copyright applies as soon as an image is created. Registering with the copyright office adds legal protection.
Creative Commons licenses let others use your work under set terms. Choose a license that fits your goals. Some allow commercial use, others don’t.
Watermarks can deter theft but may distract from the image. Using metadata helps identify the creator if an image is shared.
Be careful when using others’ images. Always check the license and give proper credit. Stock photo sites offer licensed images for commercial use.
Privacy and Personalization in Photography
Photography involves balancing personal expression with privacy concerns. Photographers must consider how they handle data and personalize experiences while respecting individual rights.
Understanding Cookie Notices
Websites use cookies to track visitor behavior and preferences. For photography sites, this helps customize content and remember settings. Cookie notices inform users about data collection practices.
Photographers should clearly explain what information they gather and how it’s used. This builds trust with visitors. Common cookie types include:
- Session cookies: Temporary, deleted when browser closes
- Persistent cookies: Stored long-term to remember preferences
- Third-party cookies: Set by external services like analytics
It’s important to get user consent before setting non-essential cookies. Provide easy opt-out options for those who prefer not to be tracked.
Advertising Choices and Personal Data
Personalized ads can help photographers reach potential clients. But they must handle personal data responsibly.
Key points to consider:
- Collect only necessary information
- Store data securely
- Allow users to control their ad preferences
- Be transparent about data sharing practices
Photographers should offer clear opt-out methods for targeted ads. This respects user privacy while still allowing relevant marketing.
Some platforms let users see why they’re shown certain ads. This transparency builds trust. Photographers can explain how data improves the shopping experience.
Audience Insights and Improving Products
Analytics help photographers understand their audience. This data shapes business decisions and product improvements.
Common insights include:
- Popular photo styles or themes
- Preferred purchase methods
- Geographic location of customers
- Device types used to view content
Photographers use this information to:
- Create more engaging content
- Optimize website design for different devices
- Offer location-specific services or products
- Improve the overall customer experience
It’s crucial to anonymize data when possible. This protects individual privacy while still providing valuable insights. Photographers should clearly explain how they use audience data to benefit customers.